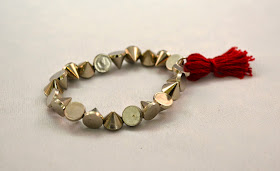
But the stretch bracelets that I have avoided making for years since they seem too basic and childish bypass all those problems. So here is a quick, updated, adult version on how to make those stretchy bracelets.
For this DIY, you will need:
- Clear Stretch Cord (My beads were small so I stuck with a thinner stretch cord. Use a thicker stretch cord if you are using larger beads)
- Assorted beads
- Scissors
- Glue (optional but recommended)
- String (optional)
- Jump rings (optional)
- Pliers (optional and not pictured)
- Charm or Tassel (optional and not pictured)
1.
Begin by measuring the length of your wrist. I like to cut out the exact length with a piece of string so I know how many beads to use. Cut your stretch cord a about an inch or so longer so you can make a knot at the end.
2.
String on your beads. If you are using a center bead that has a larger hole, place it near the end so you can hide the knot.
3.
Make a knot and dab a little bit of glue on the knot to secure it. After the glue dries, cut off the excess stretch cord and hide the knot under the bead.
4.
If you don't have bead with a large hole, you can cover the knot by adding on a charm or tassel with a jump ring. If you need a reminder on how to make a tassel, click here.
And that's it. Each bracelet takes less than five minutes, so you can whip out a few in one sitting and make a set!
Enjoy!


I love stretch bracelets, they are so fun
ReplyDeleteMe too! They are so easy and fun to make!
Delete